Logger
r4bbit is a highly opinionated library. It is built to take away the repeating details from the developers. r4bbit notifies the developers each time when an action occurs. There are 3 types of logs.
- Message related logs (in publish and receive events),
- Debug related logs (exp. connection start, gracefully close),
- Error related logs (for each time a RabbitMQ error occurs)
In this tutorial, we will mostly focus on message related logs, and show all the options for these logs.
Default Logger
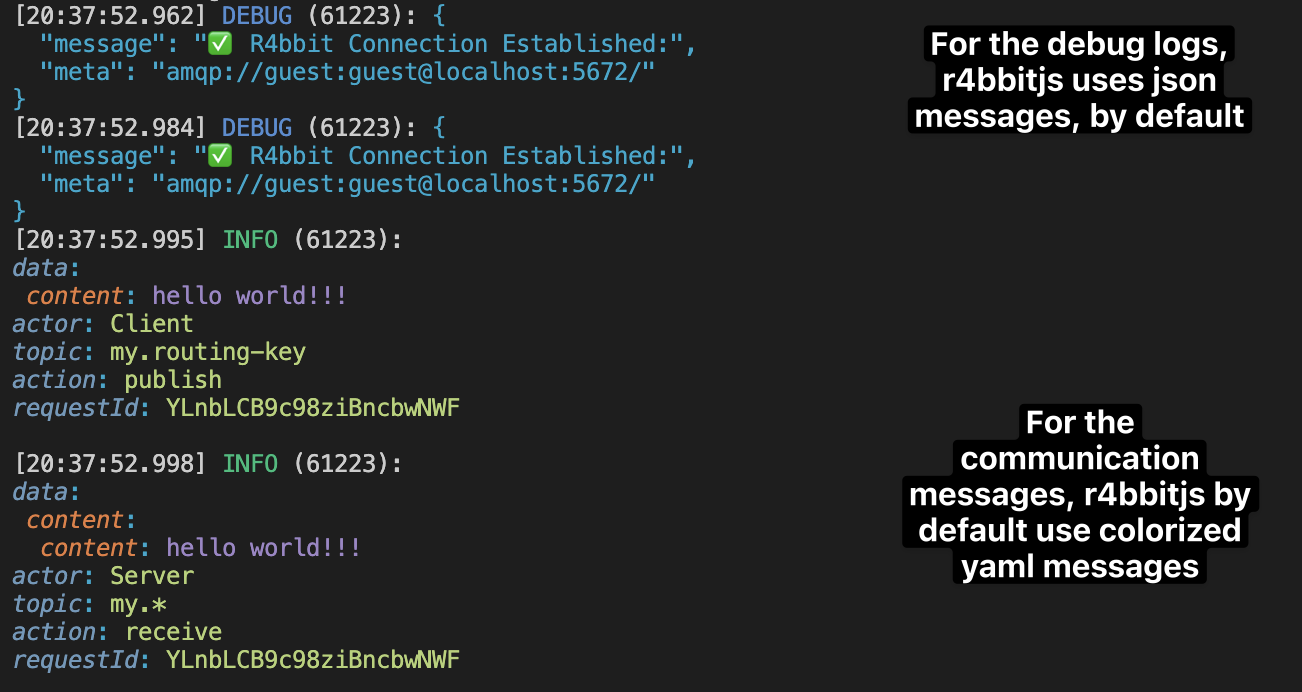
r4bbit is a batteries included library, to start using it without any effort, it comes with a small-sized logger. It uses pino to make the default logging.
r4bbit supports 2 possible ways of logging messages: json and yaml.
For the best developer experience, by default we use our yaml logs in the console. But you can specify your own logger and all the possible options with your logger.
Default Logs
Without adding any additional code, when we make an action, r4bbit logs it with its default logger. This is a colorized, yaml log.
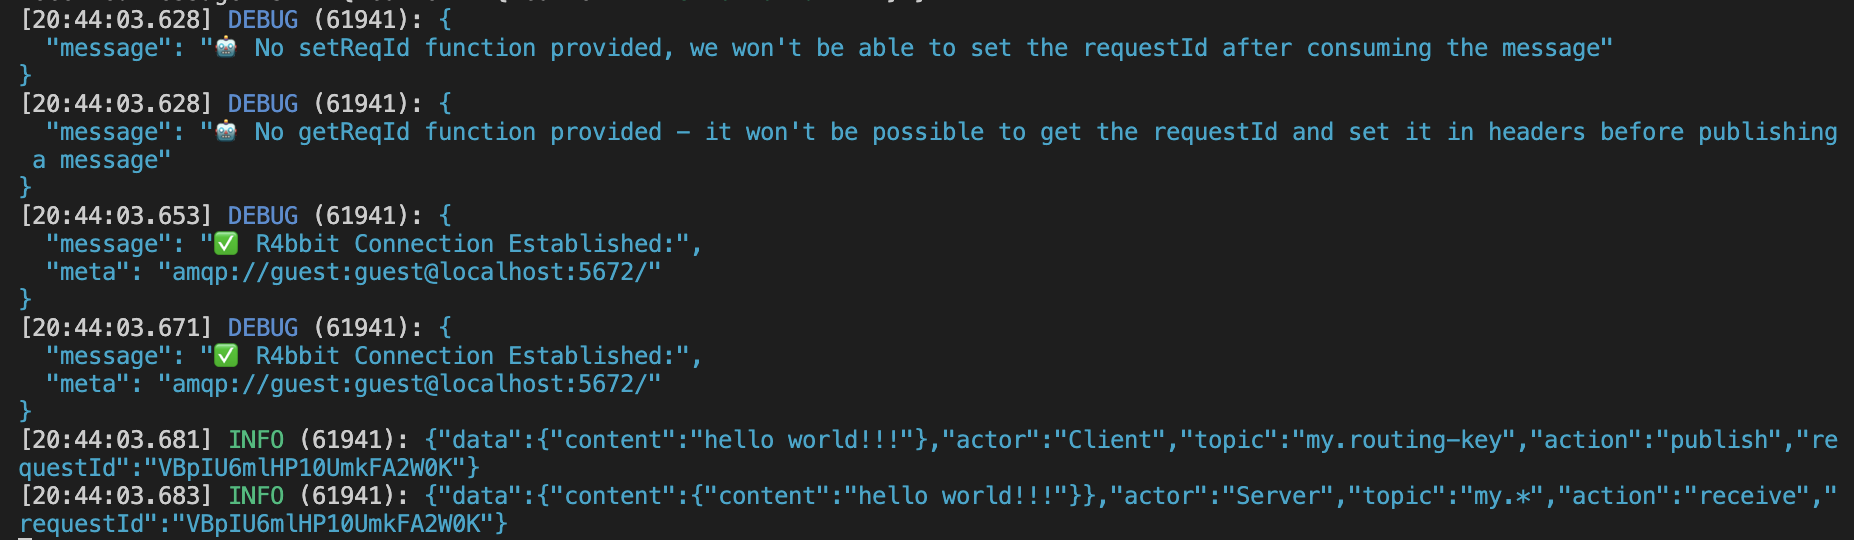
Default Logs in JSON
We may prefer using JSON logs at least in our runtime environment (To use cloud log aggregation systems like Grafana)
To set logger options we need to execute the setupLogger function before using getClient or getServer functions.
setupLogger specifies possible logging options and also different loggers (winston etc.).
We will first see the basic json option for the pino
import { getServer, getClient, ServerTypes, setupR4bbit } from "r4bbit";

await setupR4bbit({
  logger: {
    options: {
      isJson: true,
    },
  },
});
Any Other Logger (Winston example)
You can use any other logger you want, just pass it as an option to the setupR4bbit method.
import { getServer, setupR4bbit } from "r4bbit";
import * as winston from "winston";

setupR4bbit({
  logger: {
    engine: winston.createLogger({
      level: "debug",
      transports: [new winston.transports.Console()],
    }),
  },
});
After the logger is set up, you can use getServer and getClient methods as usual and the logs will be printed in the console with the logger you specified.
(async () => {
  await getServer("amqp://guest:guest@localhost:5672/");
})();
Which will result in printing the following logs in the terminal:

Yaml Format and Colors
By default, we set isColorized to true and isJson to false. This means that the logs will be printed in the console in yaml format and with colors.
You can change these options by passing them to the setupLogger method.
Let's see the uncolored, yaml log example.
setupR4bbit({
  logger: {
    engine: {
      info: (message: string) => console.log(message),
      debug: (message: string) => console.debug(message),
      error: (message: string) => console.error(message),
    },
    options: {
      isJson: false,
      isColor: false,
    },
  },
});

(async () => {
  await getServer("amqp://guest:guest@localhost:5672/");
})();
This will result in the following logs:

Please note that after selecting the isJson option, the isColorized option will be ignored (due to different colors make changes on the string and make the log unreadable for computers).
We already saw as a default option that we can colorize the logs by default in isJson: false option.
But not just that, we can even change the color palette of logging colors. In order to do that, we need to pass hexadecimal colors to the colors options
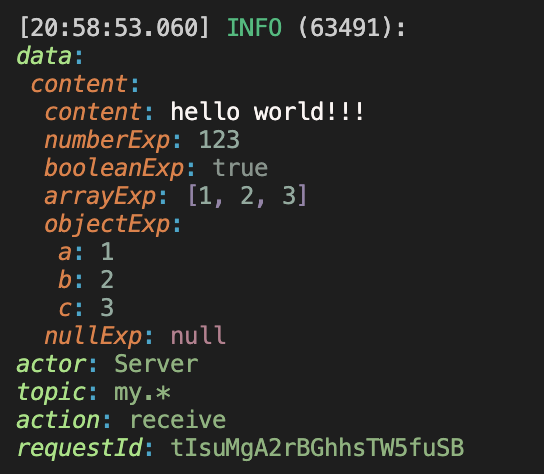
  await client.publishMessage(
    {
      content: 'hello world!!!',
      numberExp: 123,
      booleanExp: true,
      arrayExp: [1, 2, 3],
      objectExp: { a: 1, b: 2, c: 3 },
      nullExp: null,
      undefinedExp: undefined,
    },
    {
      exchangeName: 'my-exchange',
      routingKey: 'my.routing-key',
    }
  );
};

setupR4bbit({
    logger: {
      options: {
        isJson: false,
        isColor: true,
        colors: {
          array: '#4B296B',
          boolean: '#77867F',
          basic: '#87B37A',
          key: '#9CE37D',
          null: '#7B0828',
          number: '#8DAA9D',
          string: '#FBF5F3',
          undefined: '#C6878F',
        },
      },
    },
  });